Sunday, September 27, 2009

Monster Hunter 3 Bestiary: Aptonoth


APTONOTH ・ アプトノス

Area: "Kotou" Solitary Island Map (Moga Forest)
Harvest items: Raw meat 『生肉』, Small monster bone 『竜骨 (小)』

The first monster you run into, the Aptonoth is one of those nice, mild-mannered monsters that makes you feel really bad for slaying it. Being the softie that I am, I can't help but cringe every time I slash one of these. Add some calves into the mix and I end up feeling twice as guilty.

Aptonoth herds typically start running away once you attack one of them. The only exception is if you attack one of their little ones. Expect an attempt at some righteous pummeling from one of the parents.

Monster Hunter 3 Map: Area 1 - Solitary Island - Item Gathering List


孤島・SOLITARY ISLAND
Item Gathering List

Here is a list of the items you can gather from Monster Hunter 3 Tri's first map, "Kotou" (孤島) or Solitary Island. The island's 13 areas (including the Base Camp) house a total of 32 gathering points, which are marked by the following telltale signs:

- Seed point: Looks almost like small brown rocks.
- Mushroom point: Pretty easy to spot. Just look for, well, a mushroom.
- Grass point: Actually looks more like a plant.
- Bee point: Look for a hive.
- Bug point: An area with bugs flying around.
- Rock point: Marked by a big, conspicuous rock.
- Bone point: Look for a bone piece that kind of looks like a white stone.
- Fishing point: Basically marked by a body of water.

I tried to match names to accepted English conventions from past Monster Hunter games. Those that I couldn't find a match for are marked with a question mark (?). In most cases, these are items that are new to MH3. Now on to the list:

BASE CAMP
Fishing Point
大食いマグロ = Glutton tuna
キレアジ = Knife mackerel
小金魚 = Small goldenfish
はじけイワシ = Rumblefish
ハリマグロ = Pin tuna

AREA 1
Grass Point
イキツギ藻 = Breather algae (?)
クモの巣 = Spiderweb
ツタの葉 = Ivy
ネンチャク草 = Sap plant
怪力の種 = Power seed
マタタビ = Felvine
虫の死骸 = Insect husk
薬草 = Herb

Rock Point
石ころ = Stone
水光原珠 = Suiko jewel
大地の結晶 = Earth crystal
鉄鉱石 = Iron ore
砥石 = Whetstone
マカライト鉱石 = Machalite ore

Bug point
釣りバッタ = Cricket
釣りホタル = Firefly
にが虫 = Bitterbug
光蟲 = Flashbug
不死虫 = Godbug
虫の死骸 = Insect husk
雷光虫 = Thunderbug

AREA 2
Bee point
ハチミツ = Honey
ツチハチノコ = Snakebee larva
虫の死骸 = Insect husk

Mushroom point
特産キノコ = Special mushroom
厳選キノコ = Select mushroom
アオキノコ = Blue mushroom
ドキドキキノコ = Exciteshroom
マンドラゴラ = Dragon toadstool
虫の死骸 = Insect husk

Grass point
イキツギ藻 = Breather algae (?)
クモの巣 = Spiderweb
ツタの葉 = Ivy
ネンチャク草 = Sap plant
怪力の種 = Power seed
薬草 = Herb

Seed point
ツタの葉 = Ivy
ネンチャク草 = Sap plant
怪力の種 = Power seed
げどく草 = Antidote herb
ペイントの実 = Paintberry

Bug point
釣りバッタ = Cricket
釣りホタル = Firefly
にが虫 = Bitterbug
光蟲 = Flashbug
不死虫 = Godbug
虫の死骸 = Insect husk
雷光虫 = Thunderbug

AREA 3
Bee point
ハチミツ = Honey
ツチハチノコ = Snakebee larva
虫の死骸 = Insect husk

Mushroom point
特産キノコ = Special mushroom
厳選キノコ = Select mushroom
アオキノコ = Blue mushroom
ドキドキキノコ = Exciteshroom
マンドラゴラ = Dragon toadstool
虫の死骸 = Insect husk

Bug point
釣りバッタ = Cricket
釣りホタル = Firefly
にが虫 = Bitterbug
光蟲 = Flashbug
不死虫 = Godbug
虫の死骸 = Insect husk
雷光虫 = Thunderbug

AREA 4
Rock Point
石ころ = Stone
水光原珠 = Suiko jewel
大地の結晶 = Earth crystal
鉄鉱石 = Iron ore
砥石 = Whetstone
マカライト鉱石 = Machalite ore

Bug point
釣りホタル = Firefly
にが虫 = Bitterbug
光蟲 = Flashbug
不死虫 = Godbug
虫の死骸 = Insect husk
雷光虫 = Thunderbug

AREA 5
Bone point
なぞの頭骨 = Unknown skull
なぞの骨 = Mystery bone
棒状の骨 = Bone
竜骨 (小) = Small monster bone

Bug point
釣りバッタ = Cricket
釣りホタル = Firefly
にが虫 = Bitterbug
光蟲 = Flashbug
不死虫 = Godbug
虫の死骸 = Insect husk
雷光虫 = Thunderbug
クモの巣 = Spiderweb

AREA 6
Mushroom point
特産キノコ = Special mushroom
厳選キノコ = Select mushroom
アオキノコ = Blue mushroom

Bone point
なぞの頭骨 = Unknown skull
なぞの骨 = Mystery bone
棒状の骨 = Bone
竜骨 (小) = Small monster bone

Rock point
水光原珠 = Suiko jewel
鉄鉱石 = Iron ore
砥石 = Whetstone
マカライト鉱石 = Machalite ore

AREA 7
Mushroom point
特産キノコ = Special mushroom
厳選キノコ = Select mushroom
アオキノコ = Blue mushroom

Grass point
マタタビ = Felvine
虫の死骸 = Insect husk
薬草 = Herb

Bone point
虫の死骸 = Insect husk
砥石 = Whetstone
石ころ = Stone

Rock Point
石ころ = Stone
水光原珠 = Suiko jewel
大地の結晶 = Earth crystal
鉄鉱石 = Iron ore
砥石 = Whetstone
マカライト鉱石 = Machalite ore

AREA 8
Bone point
なぞの骨 = Mystery bone
棒状の骨 = Bone
竜骨 (小) = Small monster bone
石ころ = Stone
飛竜の卵 = Wyvern egg
マカライト鉱石 = Machalite ore
モンスターのフン = Dung

Rock Point
水光原珠 = Suiko jewel
大地の結晶 = Earth crystal
鉄鉱石 = Iron ore
砥石 = Whetstone
マカライト鉱石 = Machalite ore

AREA 9
Seed point
怪力の種 = Power seed
カラの実 = Huskberry
クモの巣 = Spiderweb
げどく草 = Antidote herb
ツタの葉 = Ivy
ネンチャク草 = Sap plant
ペイントの実 = Paintberry
虫の死骸 = Insect husk

AREA 10
Bone point
石ころ = Stone
欠けた貝殻 = Shell fragment (?)
巨大真珠 = Giant pearl (?)
黒真珠 = Black pearl
釣りカエル = Frog
釣ミミズ = Worm
ベニサンゴ石 = Crimson coral stone (?)

Rock Point
水光原珠 = Suiko jewel
大地の結晶 = Earth crystal
鉄鉱石 = Iron ore
砥石 = Whetstone
マカライト鉱石 = Machalite ore

Fishing point
大食いマグロ = Glutton tuna
キレアジ = Knife mackerel
小金魚 = Small goldenfish
ハリマグロ = Pin tuna
黄金魚 = Goldenfish
サシミウオ = Sushifish

AREA 11
Bone point
ベニサンゴ石 = Crimson coral stone (?)
石ころ = Stone
欠けた貝殻 = Shell fragment (?)
巨大真珠 = Giant pearl (?)
黒真珠 = Black pearl

AREA 12
Bone point
なぞの骨 = Mystery bone
棒状の骨 = Bone

Rock Point
水光原珠 = Suiko jewel
鉄鉱石 = Iron ore
マカライト鉱石 = Machalite ore

THE OLD MAN: Item Exchange

When you accept a quest involving the Solitary Island, you should find an old man at Area 4 by the Felyne colony. Here's a list of items he wants and what he gives you in return.

Give: 特産キノコ (Special Mushroom)
Get: 漁獲アミ (Fishing net?)

Give: 厳選キノコ (Select mushroom)
Get: ピッケル (Pickaxe)

Give: 熱成キノコ (Hot mushroom?)
Get: 漁獲モリグレート (Great fishing net?)

Give: 小金魚 (Small goldenfish)
Get: モドリ玉 (Farcaster)

Give: 黄金魚 (Goldenfish)
Get: 携帯シビレ罠 (Portable shock trap)

Give: ベニサンゴ石 (Crimson coral stone?)
Get: 虫あみ (Bugnet)

Give: 飛竜の卵 (Wyvern egg)
Get: 強走薬 (Power juice)

Give: モンスターのキモ (Monster liver?)
Get: 応急薬 (First aid medicine)

Give: 竜のナミダ (Wyvern tears)
Get: 回復薬グレート (Mega potion)

Saturday, September 26, 2009

Monster Hunter 3 Armory: Chain Armor

MACHO COMBO: Check out those billowing pantaloons, er, trousers. This actually reminds me of a story about an explorer named Magellan. No he doesn't have a monkey sidekick or a talking backpack. But he did have a set of threads that kind of-sort of looks a little bit like the stuff you see above. Anyway, he tried to conquer a bunch of near-nekkid natives while clad in his superior armor and armed with his superior guns. Unfortunately for him, he received a superior beatdown. The moral of this story? Don't be complacent or else your prey just might hand you your derriere on a silver platter.

Anywho, beginning mad scientists will apparently get a kick out of equipping the Chain Armor set. Now go get your mixology on.

CHAIN SET

Rarity: 1
Selling price: 400z
Production price: 200z

Skills:
- Combine success + 25%『調合成功率 + 25%』
Skill point 15: Increases combination success rate by 25 percent.
- Max combo limit 『最大数生産』予測 複数個 作成
Skill point 10: Get the max amount of items possible when combining.
- Fishing expert 『釣り名人』
Skill point 10: With the exception of frog bait, makes reeling in one's
catch easier.
- Health +20『体力 +20』
Skill point 10: Increases max health by 20

Base defense: +2
Max upgraded defense: +9 (requires 鎧玉 Armor Sphere x 2, 上鎧玉 Armor Sphere+
x 1 and 尖鎧玉 Sharp Armor Sphere x 4)
Resistance (all parts): Fire -1, Water -1, Ice +3, Thunder -1, Dragon +1

Components:
チェーンヘッド Chain helm
Slots: 1
Material: 鉄鉱石 Iron Ore x 1, 砥石 Whetstone x1
Skills: Attack +1, Fishing +1, Combination success +6, Combination limit
+1

チェーンベスト Chain vest
Slots: 0
Material: 鉄鉱石 Iron Ore x 1, 暖かい毛皮 Warm pelt x 1
Skills: Attack +3, Fishing +1, Combination success +4, Combination limit
+1

チェーングラブ Chain glove
Slots: 1
Material:鉄鉱石 Iron Ore x 1, 砥石 Whetstone x1
Skills: Attack +3, Fishing +2, Combination success +2, Combination limit
+2

チェーンベルト Chain belt
Slots: 1
Material: 鉄鉱石 Iron Ore x 1, 大地の結晶 Earth Crystal x1
Skills: Attack +1, Fishing +2, Combination success +2, Combination limit
+4

チェーンパンツ Chain leggings
Slots: 1
Material: 鉄鉱石 Iron Ore x 1, 暖かい毛皮 Warm pelt x 1
Skills: Attack +2, Fishing +4, Combination success +1, Combination limit
+2

*NOTE: This info is translated from a Japanese source. While I tried to match the translations to the official English conventions, there may be some cases when they don't exactly match.

Friday, September 25, 2009

Monster Hunter 3 Armory: Leather Armor


OOH, LE-THURRRR: The material of choice for fashionistas and the Village People, leather provides monster-hunting rookies the cheapest alternative for protection. While not exactly providing the sturdiest of defenses, it does help beginners fill their broke pockets via gathering bonuses. Check out its smooth, supple characteristics below.

LEATHER SET

Rarity: 1
Selling price: 300z
Production price: 150z

Skills:
- Spirit's whim 『精霊気まぐれ』
Skill point 10: Reduces chance of breaking tools such pickaxes, bugnets
and harpoons.
- Gathering +1 『採取 』
Skill point 10: Increase number of items that can be taken from a gathering
spot.
- High-speed gathering 『高速収集』
Skill point 10: Increases speed for gathering, mining, bug catching and
monster harvesting.

Base defense: +1
Max upgraded defense: +9 (requires 鎧玉 Armor Sphere x 2, 上鎧玉 Armor Sphere+
x 1 and 尖鎧玉 Sharp Armor Sphere x 5)
Resistance (except cap): Fire -1, Water 0, Ice 0, Thunder +3, Dragon +2

Components:
レザーヘッド Leather helm
Slots: 1
Material: 暖かい毛皮 Warm pelt x 1
Skills: Attack +1, Gathering +2, High-speed gathering +2, Whim +3

レザーベスト Leather vest
Slots: 1
Material: 暖かい毛皮 Warm pelt x 1
Skills: Gathering +2, High-speed gathering +3, Whim +2

レザーグラブ Leather glove
Slots: 1
Material: 暖かい毛皮 Warm pelt x 1
Skills: Attack +1, Gathering +1, High-speed gathering +2, Whim +4

レザーベルト Leather belt
Slots: 1
Material: 暖かい毛皮 Warm pelt x 1
Skills: Attack +1, Gathering +4, High-speed gathering +2, Whim +1

レザーパンツ Leather leggings
Slots: 1
Material: 暖かい毛皮 Warm pelt x 1
Skills: Attack +1, Gathering +3, High-speed gathering +1, Whim +3

*NOTE: This info is translated from a Japanese source. While I tried to match the translations to the official English conventions, there may be some cases when they don't exactly match.

Wednesday, September 23, 2009

Monster Hunter Tri Rookie Guide Book


SOME KIND OF MONSTER: I love Japanese guide books. Whether it be cookbooks or game guides, nothing beats the presentation and overall usability of a Japanese guide book done right.

So when i finally got my grubby paws on Monster Hunter 3 (Tri) for the Wii, the first thing I tried to do was look for a Japanese game guide. Much to my surprise, the only guides that were out were either introductory guides or super-specific ones that focused on one thing, like a monster list or equipment. There were none of the full, comprehensive guides that I've come to expect.

Still, I really wanted to get a guide book for this game so I decided to order the Rookie's Guide pictured above. It's a bit of a hit on my pride to be called a rookie. Then again, using a guide is technically a hit on anyone's pride anyway so what the heck. I ultimately picked this one out of all the "starter guides" after reading the comments by Japanese folks who purchased the book online. Plus, it came with a free DVD and yours truly is a sucker for free stuff. Well, technically, I guess it isn't free but I'm pretending it is to make myself feel better, especially after the debacle that is the Dengeki guide for SD Gundam G Generation Wars for the Wii. Boy was that a horrible guide. Not only does it NOT have a full list of robot combos, it also only has guides for the first stage of each scenario. What the heck am I paying for if a guide doesn't have, well, a guide for the really important stuff? And the darn book is titled "Perfect Guide!" Boo, Dengkei, boo. Boy, did I make a mistake not reading the reviews for that one. Now I gotta order another guide by Namco Bandai Books, and it takes about a month for me to get this stuff here in the U.S. via Kinokuniya. Grr, Dengeki, grr. At least looks this other book looks more promising based on the buyer comments. I am now crossing my fingers.

Of course, the good news with this whole Dengeki book debacle is that it made it easier for me to pick which game to focus on first. That would be MH3. Well, I actually also have Kekkaishi Wii and Tales of Hearts for the DS to start but we'll see how that goes. The plan is to basically go through the book for any interesting tidbits to turn into FAQ material and also start to progress through my first character file. I actually have a second file I'm using for the translation guide I'm working on but transcribing all the character conversations takes so long that I just want to play the game already. This'll be the first weekend in about a month that I haven't had to take a trip somewhere so here's hoping I make some progress. Till next time, my non-existent readers. Ciao! SHINGENMOCHI

For those who are interested in this book, here is some info:

MONSTER HUNTER 3 (TRI) ROOKIE'S GUIDE
Publisher: Enterbrain
Price: 998 yen
Pages: 127
ISBN-10: 4757750471
ISBN-13: 978-4757750470
Publish date: Aug. 1, 2009

Saturday, August 22, 2009

Baby Got Backlog: SD Gundam G Generation Wars (Wii)

THE BACKLOG NEVER ENDS: Saying that I have a huge backlog of unplayed games is, to put it kindly, an understatement.

Just to show how long this backlog has been going on, my unopened games include: Devil May Cry 4 (that, like, came out when again?) and The Orange Box (yes, criminal, I know) for 360, and Rock Band 2: Special Edition (still got this huge unopened box in my living room) and BlazBlu (hopefully it still won't be unopened by this time next year) for the PS3. And that's just a small fraction of the games I have yet to touch.

Now the backlog has grown by one yet again with the release of SD Gundam G Generation Wars for the Wii. So now I'm trying to decide whether to start playing this game or buck up and try to get as much done with Monster Hunter 3 like I originally planned. Maybe I'll try ordering some Japanese game guides for now and see where that goes. Ah, choices, choices.

Anyway, here's a quick translation of SD Gundam G Generation Wars' in-battle menus to help new players and those with limited understanding of Japanese to get started:

MAIN BATTLE MENU
Pressing the "2" button while your square cursor is at an empty space on the screen brings up the main battle menu. This menu has the following 11 options:

1. パス
Pass your current turn. Click on this to change phases once you're done controlling your units for the current turn. You will also get a display of how many units you haven't moved if applicable.
2. ミッション表示
Mission info. Click on this to find out the current mission's conditions. 『勝利条件』refers to the conditions needed for victory. An example would be [敵軍ユニットの全滅] which means "Complete annihilation of all enemy units." 『敗北条件』refers to conditions for defeat. A common example is the destruction of your main or "master unit" and certain key allies. 『攻略条件』refers to conditions for capture, if applicable.
3. ウォーズトリガー
"Wars Trigger" conditions. This lists special conditions you need to fulfill to trigger a special event or bonus. In the G Gundam's first scenario, for example, the Wars Trigger conditions are to first defeat Master Gundam with Domon's unit and then defeat Shagia and Olba with your main or "master unit."
4. 捕獲リスト
Capture list. View the units you have captured. The basic way to capture a unit is to destroy its mothership, or in the case of Death Army units, destroy the Gundam Head that sent them out. Once the units have white flags on their icons, you can capture them as long as your mothership has available space and is within range. Just click on your mothership and pick the 『捕獲』command.
5. 部隊情報
Squad info. Clicking on this allows you to view information about your various pilots and units. You can also use this as a shortcut to find one of your units on the field by highlighting the appropriate pilot and clicking on him or her.
6. 会話ログ
Conversation log. Use this to view the conversations that have transpired so far between allied/enemy characters during the stage.
7. ギブアップ
Literally translates to "Give up." Let's you quit the current stage.
8. 情報表示
Information display. This allows you to enable or disable the "HP/EN view" or "STEP view" for your units on the field.
9. MAP移動
Change maps. This works in stages where you have more than one map that you could switch to and from.
10. ロード
Load save data.
11. セーブ
Save your current turn.

MOBILE SUIT/UNIT BATTLE MENU
Clicking the "2" button while highlighting a unit that has not moved yet will bring up the following options:
1. 移動
Move unit. Pretty self-explanatory
2. 攻撃
Select attack. In some cases, you will have an extra pop-up menu appear when you are attacking with an allied unit close by. This menu will usually have two options: 『決定』lets you proceed with the attack you selected. 『支援』lets you choose an allied unit to provide a support attack. The latter is especially useful in taking down beefy enemies in one turn. This also looks pretty funny if you gang up on a unit with a gajillion of your allies. Master units and squad leaders can typically request a support attack, provided the allied unit is within attacking range of the target and has not ended its turn.
3. 確定
End move. Unlike the "Turn End" command from the main battle menu, this only ends the unit's movement, not the entire turn.

*** Depending on stage conditions and a unit's abilities, some extra options can appear here as well. An example is 『着地』 which lets a flight-capable unit land on the ground if it is airborne. Conversely 『浮遊』 lets a flight-capable unit that's standing on the ground ascend into the air. I have yet to play a stage that has water, but the command to submerge a unit underwater is typically 『水中』. Each terrain provides advantages, especially when used in conjunction with suitable units. Examples can range anywhere from improved movement to higher attack damage.

When being attacked by an enemy unit, the following menu options appear:
1. 反撃
Counterattack or return fire. On a related note, you can also sometimes activate 『支援反撃』 or "Support Attack" and, for the lack of a better word, 『支援防御』 or "Support Defend" when you are being attacked by an enemy while you have an allied unit close by. "Support Attack" allows you to counterattack with an allied unit while "Support Defend" allows an allied unit to take an enemy hit for you, quite useful when you need to protect a unit with low HP.
2. 防御
Defend. This option appears if the unit has the ability to defend, like if it has the "Shield Ability" for example. When applicable, 『支援防御』 or "Support Defend" will also appear if a capable ally is close by.
3. 回避
Evade. 『支援防御』 or "Support Defend" can also appear if you pick this when applicable.

MOTHERSHIP BATTLE MENU
Clicking on your mothership during battle brings up the following options:
1. 移動
Move ship.
2. 攻撃
Attack.
3. 出撃
Launch mobile suits/units.
4. 回頭
Turn ship around. This is especially useful if you want increased mobility toward a certain direction since ships can move further when heading forward or sideways as opposed to moving backward.
5. 散布
Dispersion. This allows your ship to disperse Minovsky particles within a set a radius to lower enemy accuracy.
6. 確定
End ship's move.
7. 確保
When applicable, the 『捕獲』or "Capture" command becomes available. To use this, you must have an enemy unit that can be captured on the field (indicated by a white flag), be in range and have enough free space in your mothership.

"A" BUTTON MENUS
Pressing the "A" button brings up different menus depending on where your cursor is.

Pressing "A" while your cursor is on a unit brings up a 5-page menu:
Page 1: This contains info on your unit's different attacks on the left side. On the right side, it lists your unit's name, experience, hit points, energy, size, attack power, defensive power, mobility, movement range and ratings for space, sky, land, over water, and underwater.
Page 2: List a unit's various abilities. Shining Gundam, for example, has Super Mode, Shield Defense, and the Support Command, for triggering support attacks and defense.
Page 3: Lists any Option Parts attached to your unit.
Page 4: Lists Character Data and ratings. The left side has the pilot's number of Ace points and ratings for piloting (mobile suits/units), commanding a ship, communications, steering a ship, and mechanical ability (e.g. for repairs). There's also a chart for the following parameters:
『射撃』 Shooting. Indicator of a pilot's skills with rifles and long-range attacks.
『格闘』 Melee. Indicator of a pilot's hand-to-hand fighting skills.
『反応』 Reaction. Measures reaction time, including the ability to dodge attacks.
『守備』 Defense. Indicator of a pilot's defense ability.
『覚醒』 Awakening. Impacts ability to use psycom and funnel-type weapons, along with how often Newtype abilities such as "Pressure" will trigger.
『魅力』 Charm/appeal. This stat is important for a ship's 『ゲスト』 or "Guest" position, which impacts MP recovery.On the right side is the pilot's name, level, experience, and MP points
(which impacts your tension gauge). There's also another parameter chart, except it lists numerical values instead of a graph.
Page 5: Lists character abilities.

Pressing the "A" button while the cursor in on a ship brings up a 6-page menu:
Page 1: Same as Page 1 for units with the addition of "Group" and "Team" numbers.
Page 2: Lists team members.
Page 3: Lists the bridge crew.
Page 4: Lists unit abilities, such as being able to disperse Minovsky particles, for example.
Page 5: Lists attached Option Parts.
Page 6: Lists captured units.

Pressing the "A" button on an empty space in the map brings up a mini-map on the left. On a side note, pressing the "1" button on an empty slot brings up terrain info while doing so while highlighting a unit brings up movement range data, a leader/master character's sphere of influence, and a team's effective operation area. Units and ships on the same team will also blink.

Well, that's it for now. I'm also thinking of doing a translation for the operations room menu, which is where you set your groups and do mobile suit research and combinations. But that's a guide for another time. Folks with questions, suggestions or corrections about this particular FAQ can feel free to post a message here. SHINGENMOCHI

Wednesday, August 12, 2009

SHINGENMOCHI'S Monster Hunter 3 (Tri) Page


Konnichiwa. Here's my attempt at helping beginners waddle through the Japanese version of Monster Hunter 3 (Tri), at least until the English version drops. Here are my current offerings:

The MH3 Menu and Quick Start Guide
- A rundown of MH3's opening and in-game menus, along with a quick guide to get you started on your adventure.

The Offline Quest Flowchart
- A basic guide for unlocking all quests up to the Lagiacruz battle.

Hunting/Resource Exchange Guide

- A guide to stuff you can get from the Village Elder's son in exchange for your hunting prowess.

Fishing Spots
- Your guide to knowing where the fishies are.

The MH3 Translation Guide
- A line-by-line translation of the MH3's in-game conversations. This might, um, take a while.
UPDATE: With the game now coming out officially in the U.S. this project has been scrapped.

The MH3 Map Library
- These maps include lists of what items you can get at each area's gathering points.
Map 1: "Kotou" - Solitary Island

I started doing the stuff below before I noticed the great job being done at the Monster Hunter 3 Wikia. I recommend going there instead!

The MH3 Armory
- An in-depth look at armor sets and weapons
Leather Set
Chain Set

The MH3 Bestiary
- Monsters, monsters and monsters
Aptonoth 『アプトノス』

As always, feel free to leave feedback, questions, suggestions or requests via the blog comments. SHINGENMOCHI

Translation: Monster Hunter 3 (Wii) Menus & Quick Start Guide

TURNING JAPANESE
Turning Japanese video games into English, well sort of...


This guide is for beginner monster hunters who need a bit of help with the game's Japanese menus and getting started. Data will be based on the beginning of the game, though I may update or add certain menus (e.g. Arena info, for example is not included yet) depending on my progress through Monster Hunter 3.

On a side note, I'm using this game for Japanese reading practice so I'm also doing a literal transcription of the in-game conversations between characters so I can re-read it whenever I want. You can find the link to my Monster Hunter 3 translations, which will be updated in bits and pieces, HERE.

In the interest of full disclosure, I'm certainly no Monster Hunter 3 expert, nor do I play online (I swore off online play cold turkey after developing sleep deprivation playing Phantasy Star Universe. That's what happens when folks with limited free time try to squeeze in a MMORPG in their schedule.) As such, I recommend directing any questions related to in-depth strategy or network play to someone other than yours truly.

Now on to the guide. This guide is divided into:

A01. OPENING MENUS
B02. ROOM MENUS
C03. GENERAL STORE MENU
D04: WEAPON SHOP MENU
E05: FIELD MENU


A01. OPENING MENUS

From the opening screen: Press A

SCREEN 1: MAIN SCREEN

1. ゲームスタート (Start Game)
At the risk of stating the painfully obvious, this is where you start a new game or load a previous one. This is also where you create a new character.
2. 闘技場で遊ぶ (Arena Play)
Play at the arena with created characters. This allows local 2P multiplayer using characters either from a Wii save file or downloaded to the Wiimote.
3. ギャラリー (Gallery)
Check all the monster-licious movies that you have unlocked.

SCREEN 2A: From the Start Game (001) screen
You will be prompted to pick a file to use. Noted that you can have up to 3 characters in one file. Once you pick a file, you will see three options:

1. ゲームを始める (Begin game)
2. 名前を変える (Change file name)
3. 初期化する (Format file. NOTE: This will erase characters in a previously created file! That would either be stunningly sad or freaking hilarious depending on whether it happens to you or someone else.)

SCREEN 2A-1: From the "Begin game" option, you will open up 3 options in English, which are quite self-explanatory:

1. NEW GAME
2. CONTINUE
3. OPTIONS

NEW GAME
Selecting new game takes you to the 『キャラクター作成』or Character creation screen. The options here are pretty easy to figure out but I'm listing them below anyway to satisfy my obsessive compulsive tendencies:

名前: Name your character, unless you want to be the second coming of Fred Dryer. The 『大』 button is for switching to caps. Right below the 『名前』tab is a circle button for "switching teams" so to speak, i.e. changing genders. You know you want to (not that there's anything wrong with that).

肌の色: Skin color. Witness the United Colors of Benetton in all its splendor.

インナ: Undergarments. More Under Armour than Victoria's Secret.

インナ色: Undergarment color. If you ever wanted to hunt in pink undies, now's your chance...

顔: Face. Why, hello there good-looking. Or maybe not.

目の色: Eye color. Fans of possessed, white-eyed victims and that strange Limp Bizkit dude with the black contacts will be so pleased.

顔オパーツ: Facial, um, art. Yo, let me tell you how I got this scar.

髪型: Hairstyle. Pick a 'do for your big, bad hunter. Don't worry fans of effeminate-looking Japanese guys who would be massacred by monsters in real life. Capcom thought of you, too.

髪の色: Hair color. If you want to pick pink hair to go with that pink underwear you chose earlier in the undergarment tab, well, this is the place to do it, holmes.

ボイス: Voice. May I suggest a wimpy boy voice to go with a tough-looking character sporting a scar?

*Once you're done creating your cool character, you'll see another gorgeous and also mildly traumatic scene with dudes showing you their packages. I think I just went blind. From here, you can jump to the QUICK START guide at the end of this FAQ.

CONTINUE
Captain Obvious here again. This is for folks who already created a file.

村へ行く (Go to village)
Also known as "Single Mode." "But I have a girlfriend!" you say. Sure you do. Anywho, this is the game's Offline Mode for solo artists, folks with no friends, or broke students who can't afford to pay Capcom Japan that monthly online fee.

街へ行く
Network Mode. For folks who like to "get bee-zay" (What is this "bee-zay" that you speak of, shingenmochi? Is it edible?). If you pick this, do keep in mind that Capcom's lawyers would like to have a word with you ... or two ... or three. Ah, the perils of talking to strangers online.

OPTIONS
Note that pressing the "C" button with any of the following resets options to their original settings.

1. モニター設定 (Monitor settings)

》 スクリーンサイズ (Screen size)
Size matters. At least that's what late-night infomercials want you to believe. This allows you to change screen size to either 4:3 or 16:9 aspect ratio.

》 明るさ (Brightness)
Adjust your screen's brightness settings. 'Cause you're a star. Just please don't tell me you're "in a rock band" or that you "gave all your fat clothes to your fat friends." Apparently, getting a Bowflex turns you into an insufferable jerk.

2. サウンド設定 (Sound settings)

》BGM 音量 (BGM volume)
Adjust volume for that dramatic background music you hear. For Frodo!!!

》SE 音量 (SE volume)
Adjust volume for sound effects. Dying is so much more impressive when you shriek like you mean it.

3. ゲームの環境設定 (Game environment settings)
Basically, pick the 『通常』or the "Normal" option on the left if you don't mind seeing blood in the game. Otherwise, pick 『ひかえめ』 or "Limited/restrained" to spare your virgin eyes of all that violence.

4. コントロラー設定 (Controller settings)

》 フリースタイル操作 (Freestyle method)
Uses the Wiimote/nunchuck combination

》 クラシック操作1 (Classic method 1)
Uses Classic Controller pad buttons

》 クラシック操作2 (Classic method 2)
Uses Classic Controller analogue stick

5. ゲーム設定
》簡易ロード設定 (Simplified loading mode)
Simplifies character select screen to shorten load times when you turn on the game. Everyone wants instant gratification these days.


B02. ROOM MENUS
After talking to the elder at the start of the game, you will get your own room, which is located just to the top right of your starting location.
You have several options from here:

- SAVING
You can save in your room by clicking on the bed and picking the first option. You can also sleep and go to the next day by picking the second option. Incidentally, that normally got you in trouble in Sakura Taisen games. Sleeping is not available during the daytime. Expect a complaint from the People for the Ethical Treatment of Vampires.

- ITEM BOX
Clicking at the red item box in your room will open up several options. Note that you could do the following commands at any time within this menu:

Analog stick: Rotate you character
C button: Opens up the "C menu." From the C menu you can:
- Rotate your character by holding the analog stick left or right.
- Move the screen up or down by holding the analog stick up or down.
- Zoom in with the "+" button and zoom out with the "-" button.
- Make your weapon appear or disappear with the "1" button.
- Get out of the C menu by pressing the C button again.

Now on to the 7 options from the Item Box menu:

1) アイテムをしまう
Store items in either your regular Item Box 『アイテムBOX』 or your Gunner Pouch 『ガンナー用ポーチ』.

2) アイテムを取り出す
Take out items from either your Item Box or your Gunner Pouch.

3) アイテムの調合や売却
Item combining or selling. From here, you will have 3 options:
『BOX内調合』 Combine items in box. Use this to create new items from the materials you possess.
『入れ替え』 Arrange items. You can manually move stuff around by highlighting the item and clicking on the slot you want to move it to.
『売る』 Sell items.
NOTE: In all three options, you can press the "1" button to automatically organize your stuff or hold the "Z" button to activate your pointer. Pressing the "+" or "-" button lets you switch pages.

4) 装備の変更や売却
Change or sell equipment. From here, you will have 3 options yet again.
『装備する』 Change equipment
『入れ替え』 Arrange items.
『売る』 Sell items.

5) 身だしなみを整える
Change appearance. From here, you will have 4 options:
『インナーを着替える』 Change your undergarments. Just like your mama used to say.
『インナーの色を変える』 Change your undies colors. You know, like, just in case you regret that decision to pick pink earlier.
『髪型を変える』 Change hairstyle. The solution to a bad hair day.
『髪の色を変える』 Change hairstyle color. All the rebel cool minus the real-world consequences.

6) 装備のマイセット
Create and save your equipped armor sets. From here, you'll have 4 options:
『装備する』 Equip armor set. Pick from the armor sets or combos that you have registered (up to 20 sets possible).
『装備を登録する』 Register an armor set.
『入れ替え』 Change or switch pages where armor sets are recorded.
『登録装備を削除する』 Erase registered armor set.

7) ボウガンのマイセット
Create a Bowgun equipment set. From here, you will also get the same 4 options from the armor set menu above.

CAT MENU
Talking to the cat in your room allows you to access your decorations and data from your Arena exploits. You will have 2 options:
1) インテリア
Change your interior decorations. 『設置する』allows you to set items in the room while 『回収する』 allows you to take back items that are already
on display.
2) 闘技場データの取得
Acquire Arena data. 『本体データ』 will access data from your Wii while 『リモコン』 will access data from your Wiimote.


C03. GENERAL STORE MENU
To the left of your starting point is the 『雑貨屋』or General Store. Talking to the lady brings up the following options:

1) 買う
Buy items. Choices at the start of the game are listed below. For the sake of uniformity, I tried to match the item names and definitions to my Monster Hunter Freedom game as best as I could (except for the harpoon):

『薬草』Herb (20z)
『げどく草』Antidote Herb (20z)
『砥石』Whetstone (30z)
『漁獲モリ』Fishing harpoon (140z)
『ボロピッケル』Old Pickaxe (60z)
『ピッケル』Iron Pickaxe (160z)
『ボロ虫あみ』Old Bugnet (30z)
『虫あみ』Bugnet (80z)
『釣りバッタ』 Cricket (10z)
『釣りミミズ』Worm (20z)
『小タル』Small Barrel (80z)
『大タル』Large Barrel (210z)
『小タル爆弾』Sm Barrel - Bomb (156z)
『トラップツール』Trap Tool (200z)
『角笛』Flute (480z)
『双眼鏡』Binoculars (50z)
『カラの実』Huskberry (2z)
『LV2 通常弾』Normal S Lv2 (3z)
『貫通弾』Pierce S Lv1 (14z)
『散弾』Pellet S Lv1 (12z)
『 徹甲榴弾』Crag S Lv1 (41z)
『水中弾』Water S Lv1 (17z)

2) 売る
Sell items like the prehistoric capitalist that you are.

3) 買ってBOXに送る
Buy and send item to your box.


D04. WEAPON SHOP MENU
1) 買う
Buy armaments. Clicking this gives you two options:

『武器』 Buy weapon. Your initial choices are limited to:

- 大剣 (Great Sword)
Remember, the bigger the sword, the smaller the, um, never mind.
[アイアンソード] Iron Sword {Buster Sword?} (1000z)
[ボーンブレイド] Bone Blade (960z)

- 片手剣 (Sword and Shield)
[ハンターナイフ] Hunter's Dagger (960z)
[ボーンククリ] Bone Kukuri {Bone Kris?} (860z)

- ハンマー (Hammer)
[アイアンハンマー] Iron Hammer {War Hammer?} (1060z)
[ボーンハンマー] Bone Hammer {Bone Club?} (1040z)

- ランス (Lance)
[アイアンランス] Iron Lance (1100z)
[ボーンランス] Bone Lance {Longhorn?} (1080z)

-ボウガン (Bowgun)
[ライトボウガン] (3200Z)
[ミドルボウガン] Middle Bowgun (3800z)
[ヘブィボウガン] Heavy Bowgun (4600z)

『防具』 Buy armor. Your initial choices are limited to:

- 頭パーツ (Helmet)
[レザーヘッド] Leather Helm (300z)
[チェーンヘッド] Chain Helm (400z)

- 胴パーツ (Plate)
[レザーベスト] Leather Armor (300z)
[チェーンベスト] Chainmail (400z)

- 腕パーツ (Gauntlets)
[レザーグラブ] Leather Vambraces (300z)
[チェーングラブ] Chain Vambraces (400z)

- 腰パーツ (Waist)
[レザーベルト] Leather Belt (300z)
[チェーンベルト] Chain Belt (400z)

- 脚パーツ (Leggings)
[レザーパンツ] Leather Leggings (300z)
[チェーンパンツ] Chain Leggings (400z)


NOTE: Pressing the "C" button when viewing the weapon and armor menu at the shop will bring up the 『情報モード』or information mode screen. Your 4 options for weapons are:

- 基本情報
Basic info. Shows attack strength, element if any, affinity, number of slots for attaching decorations, and sharpness level (this one would be the multi-colored bar).
- 比較情報
Comparative info. Same as basic info but in comparison to another item.
- プレビュー
Shows a preview of what the weapon looks like.
- スキルー覧
Shows the weapon's available skills.

Your 4 options for armor are:

- 基本情報
Basic info. Shows defense power, level, number of slots for attaching decorations, and resistance or vulnerability to fire, water, ice, thunder and dragon.
- 比較情報
Comparative info. Same as basic info but in comparison to another item.
- プレビュー
Shows a preview of what your character will look like wearing the stuff.
- スキルー覧
Shows the armor's available skills.

2) 売る
Sell weapons. Scratch that itch you have for arms trafficking.


E05. FIELD MENU
You can access this menu by pressing the "2" button while on the field.

『基本』
The basic menu. You will have the following 6 options:

1) アイテムポーチ (Item pouch)
Check your items through this option.

2) 調合 (Combine)
This allows you to combine items in the field manually. You can actually try this right off the bat by going to the field and harvesting an herb 『薬草』 and a blue mushroom 『アオキノコ』. Combine both to make a potion.

3) マイセット調合 (Combination set)
Combine items by setting and using preset recipes.

4) ハンターノート
A collection of background info. Your choices include:
- メモ帳 (Memo booklet)
- モンスターリスト (Monster list)
- 調合リスト (Combination list)
- ハンターの心得 (Hunter's knowledge)
This fourth option is like a Hunter's encyclopedia filled with all sorts of info from explaining controls to weapon usage. There's just so much, though, that I won't be tackling it for now. One thing you might want to
check are the controls for the various weapons. To do that pick the first option 『基本&操作情報』 followed by the second option after that 『武器ことの操作』 and then the weapon of your choice.

5) アクション (Actions)
A preset list of actions on the field like waving, sitting, and generally acting like an idiot.

6) 村に戻る (Return to village)

『情報』
Information menu. You can check the following options.

1) クエスト確認 (Check quest details)
2) ステータス (Check your status)
3) 装備詳細 (Equipment detail)
4) 勲章確認 (Check merits)
5) モガの村情報 (Moga Village info)
6) オプション (Options)
- Here you can change your screen displays, volume, camera settings, etc.


QUICK START GUIDE
Welcome to Moga Village. To celebrate your arrival as the town's new hunter, Mother Nature decides to whip up a nice little earthquake. You know in the old days, that would've been enough for people to accuse you of being an harbinger of pestilence. Then again, this apparently isn't the first time that this has happened. At least that's what the village elder tells you.

The elder first talks about how the land and sea's bountiful resources have made it possible for the village to exist. He also talks up the benefits of staying in the village and how nice all the people here are. But there also seems to be trouble in paradise. For starters, a powerful monster named the Lagiacruz is making life tough for villagers and also attacking their fishing vessels. Then there's the matter of the recent earthquakes, which seem to be emanating from the sea floor.

To address the village's problems, specifically the threat from the Lagiacruz, the elder has decided to seek the services of a hunter. Hey, that's you! To boost your spirits, he mentions how people on the village believe that the Lagiacruz can't be defeated by mere human hands. Time to quit... But wait. The elder says that while the Lagiacruz is certainly a formidable monster, it is also a living creature. That means that just like humans, it also needs to eat and is susceptible to fatigue. Yay, count us in again. Let's do this, chief! Unfortunately, Mr. Chief Elder says he's too old to be chasing monsters so he'll leave the risky adventuring to young go-getters such as yourself. I think I should've renamed my hunter "Bait."

Once he's done with his little speech, the elder gives Bait, er, you 1,500z as a little pocket money. Incidentally, 1,500z is exactly how much it costs to get the full leather armor set. The elder asks you to find his son. That would be the guy who visually ambushed you by flashing you his hot little undies during the opening movie. I got one word for you: psychotherapy.

Anywho, the chief also mentions that the living quarters to your immediate right are now yours to use. Enter your room and click on the bed if you want to save. You can also talk to the cat to decorate your room with a free toadstool lamp if you wish. Cribs, here we come.

Before you set out to find the Fabulous Flasher, you can check out the General Store to the lower left or the Weapon Shop to the upper right. Once you're set, leave the village through the eastern exit to reach the field. Your target, Flasher Boy, is at the camp just off of Area 2, probably mooning the Lagiacruz or something. Now we know why the monster seems so ticked off.

Along the way, the chief will teach you some of the controls. Either the guy's wearing one of those annoying Bluetooth earpieces or he's freaking psychic. Here's a quick rundown, which is more than what the elder tells you at this point.

NUNCHUCK
Direction stick: Move
Z Button: Hold to dash. This is is also used to block when weapons such as the basic sword, great sword or lance are unsheathed.
C Button: Hold to scroll through your inventory on the lower right. Tap to reset the camera in the direction your character is facing.
Note: Shaking the nunchuck when directly above a slain monster will make your character carve it.

WIIMOTE
A button: Attack when weapon is unsheathed. Carve when weapon is sheathed and standing on top of slain monster. Harvest herbs, mushrooms, etc. Use item when "C button" is held. Your all around action button.
B button: Duck when weapon is sheathed. Roll when running or when weapon is unsheathed. Backstep when lance is unsheathed.
Minus (-) button: Kick when weapon is sheathed or using great sword. Alternate attack for weapon such as basic sword or lance.
Plus (+) button: Sheath/Unsheath sword.
1 button: Use item.
2 button: Bring up menu.
D-Pad: Move camera.
Note: Shaking the Wiimote is another way to attack.

Once you're done fooling around with the controls, go ahead and explore the 3 areas. Keep you eyes peeled for the tell tale signs of harvesting points. You should be able to harvest some herbs, shrooms, honey, insect husks, etc. Eventually, you'll run into a pack of monsters and you'll need to slay one of them so you can harvest some raw meat for El Flasher. Aim for one of the bigger monsters as attacking the little ones will earn the ire of one of the parents. They will ram your calf-abusing derriere. Being the softy that I am, I just can never get used to attacking peaceful monsters. That and being flashed by virtual villagers.

Speaking of which ... with raw meat in tow, meet The Flash at the base camp. He's apparently doing repairs on the camp since it was damaged by the quake. Once you hand him the meat, leave and go back to the village before he gets any ideas and decides to flash you again. Your first mission is now over.

Well, that's it for the very basic basics. Now go forth and hunt down some monsters! SHINGEMOCHI

Translation: Monster Hunter 3 (Wii) Vol. 1

TURNING JAPANESE
Turning Japanese video games into English, well sort of...

VOL 1: Arrival at Moga Village

After the opening movie, you will come face to face with the village elder:


Village Chief: Good morning, Sir/Madame hunter. Did you manage to sleep well last night? I was quite worried since we had another earthquake, but the most important thing of all is that you're safe.

Well, I believe introductions are in order once again. I am the chief of Moga Village. It's a pleasure to make your acquaintance.

This village owes its existence to the nearby forest and sea. Truly, we are fortunate to be blessed with such bountiful resources. It is also said that it doesn't take long for anyone who stays in this village to develop an able body and an even bigger heart. That is this village's biggest source of pride.

However, Moga Village has also been beset by one serious problem as of late. A fearsome sea monster known as the Lagiacruz has started to appear at the sea nearby. The Lagiacruz is making life difficult for the villagers. The monster doesn't even show mercy against hunting boats. At the rate that things are going, we won't even be able to launch out to sea.

And as if the Lagiacruz problem wasn't enough,there is also this issue with all these unexplained earthquakes, as you have seen recently. What we do know is that it appears that these tremors are coming from the bottom of the sea.

Anyway, these are problems that we unfortunately can not handle on our own. So I've decided that solving these problems are best left in the hands of hunters.

Indeed, the Lagiacruz has overwhelming power. Even the villagers say that it is a beast that can not be defeated by mere human hands. Nevertheless, no matter how strong a monster is, it is a living creature just like us. That means it also gets tired and it also has to eat in order for it to survive.

Ha, ha, ha, ha! If only I was 30 years younger, then I'd be out there facing this monster myself. But I too am a living creature with limits. I'll leave the thrill of risking one's life in the great seas to hunters such as yourself.

By the way, have you had a chance to meet my son? Thanks to yesterday's earthquake, we didn't have enough time to talk.

What? You haven't seen him? He should be around here somewhere. Please go look for him. Oh, I almost forgot. Here is the down payment we agreed on. I admit that it is not much, but it should at least be enough to get you some equipment.

(You'll receive 1,500 from the chief. At this point, if you want to save, just enter the tent-like structure to your right and click on the bed. Your quest to find the elder's son now begins.)

Monday, July 27, 2009

SHINGENMOCHI'S DIARY: Dragon Quest 9 Story Guide Walkthrough Vol. 3

SHINGENMOCHI'S GAME DIARY
Quick summaries of Japanese games

Scene 3: The World Tree Bears Fruit

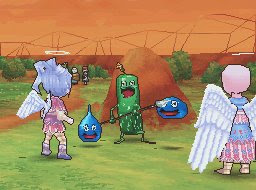
Back in the World of Angels, the appearance of the Heaven's Express causes much excitement. The angel right by the portal tells you to quickly take the star auras you've collected to the World Tree. It looks like something big is about to happen, the angel says. One angel nearby also talks about the Heaven's Express and how it's supposed to take the angels to the promised land. Another angel says that everyone appears to be heading out to check the tree and wonders what's going on. Others comment on how the the angels' role in the human world appears to be nearing an end and wonder what will happen to humans from this point on. If you haven't done so, check the room on the lower right of the first floor for an item in the chest. Breaking one of the nearby pots reveals another item.

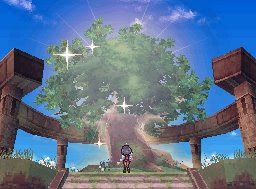
The Heaven's Express makes Rafette remember the angel Ergios, but he catches himself and remembers the subject is taboo. He also mentions that the incident involving Rafette occurred hundreds of years ago. The angels' historian, meanwhile, talks about how shocked he is to find out that humans can sometimes rewrite history for their own convenience. Back in Omui's quarters, the angels tell you that the elder has left with Eziel in quite a rush. One of them says he's never seen Omui this happy before. Head up to the World Tree again. Outside, the angel who mentioned the strange shooting stars expresses surprise that the things that she saw were actually the Heaven's Express. Others appear excited about its arrival and angels' impending return to heaven. Meanwhile, the guard informs you that Omui and Eziel are up ahead at the World Tree, and the fact that they're there means something is about to happen. At the root area, an angel remarks about the energy emanating from the tree. To the right just before you go up the tree area, you can catch an angel who snuck up to the area to see what's going on.

Your arrival at the World Tree makes Eziel quite excited and he talks about how the tree is brimming with energy and should be close to bearing fruit. Eziel then asks you to offer the star auras you collected to the tree so the angels can finally earn eternal salvation and go to the promised land. Once you offer up the star auras, watch a dramatic scene unfold. SHINGENMOCHI

* Unlike this blog's TURNING JAPANESE feature, the TABITABI DIARY does not provide line-by-line translations but just quick summaries instead. 'Cause life's just too short sometimes and actual translations take way too much time.

ドラゴンクエストIX: 星空の守り人
Dragon Quest 9: Guardian of the Star-filled Skies

Sunday, July 26, 2009

SHINGENMOCHI'S DIARY: Dragon Quest 9 Story Guide Main Page


Dragon Quest IX: Guardian of the Star-filled Skies
Story Guide Summary Page

Vol. 1: Prologue: Angels and Humans

Vol. 2: Prologue: The World Tree

SHINGENMOCHI'S DIARY: Dragon Quest 9 Story Guide Walkthrough Vol. 2

SHINGENMOCHI'S GAME DIARY
Quick summaries of Japanese games

Scene 3: Return to the Human World

Talk to the angel by the star-shaped portal to return to the surface world. It'll be your first time venturing into the human world by yourself as a guardian. Upon arriving at Uoruro, you will overhear two kids debating about the name change on the guardian angel statue. One named Needo says it has changed from Eziel's to whatever you named your character. The other says the name has always been the same. Needo goes on to say that there are no such thing as angels. After the scene, you can start moving around.

Statue: Clicking on the statue actually lets you see a funny comment: "The guardian angel statue has your name carved on it, but it doesn't look like you at all."
Needo: Clicking on Needo lets you hear him criticize Rikka for praising angels, although it also seems that he has a crush on her.

On the house on the right, just before the angel statue, you'll see Rikka's grandfather. Apparently, he feels bad for being unable to help Rikka because his isn't as strong as he used to be. He then wishes that his son was still alive.

By the well, you can overhear a conversation between two women. One expresses concern that the village chief's son apparently sometimes goes out of the village on his own. Another mentions how monsters haven't appeared in the area lately and thanks the guardian angel for it.

To the left of the well is a kid complaining about how Needo acts all high and mighty just because he's the village chief's son. The kid then prays to the guardian angel to bring some divine punishment on the little punk. Right below the kid is a dog that leads you to a Memento Ring. The description says: A precious ring dropped by a grandmother. Enter the item shop next to the dog and check the cabinets. Move over to the western part of the village.

Nun: Trying to talk to the nun makes her think that she just heard someone's voice.
Lower house by the river: A man talks about how rumors about ghosts have become more frequent lately. Outside of the house (by the river), a man talks about Rikka. He says Rikka has been working hard to keep the inn going while also taking care of her grandfather ever since her father died.
Village chief's House: Enter the westernmost house and you'll see the village chief. He'll complain about his son Needo, who does nothing but play and goof around. This makes him conclude that Needo's prospects of being the next chief are dim at best. Upstairs, the chief's daughter talks about how all the chief and Needo do is argue. She also reveals that Needo is always nice to her, though.
Inn: The guest inside the first room talks about how nice the service is in the inn and how wonderful it would be if it was bigger. Click at Rikka and you'll hear her ruminate about whether to serve bean soup or potato stew to the guest. She then says how she could have more variety with her meals if she had meat.
Stable: In the area by the Inn and chief's house, you'll see a red-haired woman who talks about how the stable owner has been working hard because he wants to a buy a new horse. Enter and you'll see tons of shining, um, "treasure." Apparently, the guy is supposed to clean the place up but is too sleepy. Do his job for him and you'll get a star aura from the grateful man, who can now buy that new horse.

Enter the church and you'll see a woman praying to the guardian for help to find her missing Memento Ring. What a coincidence. Pick the first choice to give her the ring and you'll end up putting the it in her pocket. The woman will be surprised to find the ring, which was apparently passed down from her grandfather. She expresses her gratitude to you and you get another star aura. With two star auras now in hand, it turns to night.

At the entrance, you'll see a man give thanks to you for keeping the village safe from monsters even during night time. At the house by the entrance, you'll overhear a woman grumbling about her husband not giving her thanks for doing all the house chores: "Just because I'm not the guardian angel doesn't mean he can't give me thanks, too!" I'm guessing it's due to the fact that her husband is talking in his sleep about how warm and comfortable the bed is and giving thanks to you, instead of his wife (apparently, she was the one who dried out the futon earlier in the day under the sun).

Barn:
You'll see the barn owner talking to his horse about how he'll be getting a female mate soon (i.e. the horse, not him).
Chief's house: The village chief is stewing about how Needo isn't home yet and how he'll give him an earful when he gets back. Upstairs, his daughter is sleeping soundly.
Church: You can overhear the woman who got the lost ring say that she'll clean your statue tomorrow as a way of giving thanks. Up on the left is the nun, who expresses gratitude as well.

Cross the bridge and you'll meet Eziel, who asks if you're surprised to see him in the village now that you're its protector. He says he plans to go around the world, with Uoruro Village serving as his first stop. He also says that in addition to helping the living, one of the duties of an angel is to save the souls of the dead who remain in this world. He then says that even you should have heard the voice of one such soul in the village.

Item shop: The owner recalls an event about a half a year ago where someone died after being attacked by monsters somewhere near the village. He then wonders whether that has anything to do with the much talked-about ghost.
Needo: You'll run into him having second thoughts about going home because he'll likely get chewed out by his dad again. At the same time, the ghost rumor is apparently scaring him as well, so he says maybe going home is a good idea.
Ghost: Click on the ghost and you'll hear him wondering why everyone is ignoring him. He then expresses surprise that you can see him and asks you why everyone else can't.

"Huh? Wait ... that appearance ... are you an angel?," the man asks. "I see. I had my suspicions but I guess ..."

He then asks you if his suspicion (about being dead) is correct. I picked yes.

"Thank you. Now I've realized that I've passed away. It was so painful to have people not see me. Now I can pass on." You get another star aura.

"Good job," Eziel says. "That soul has no regrets and was able to go to heaven."

He then asks you if you want to return to the world of angels. Remember the comment from that angel earlier about a strange-looking shooting star in the sky? Well, you'll soon notice the "Heaven's Express" rushing through the sky. The sight of the mysterious train makes Eziel change his mind about staying in the surface world and he decides to go back with you. SHINGENMOCHI

* Unlike this blog's TURNING JAPANESE feature, the TABITABI DIARY does not provide line-by-line translations but just quick summaries instead. 'Cause life's just too short sometimes and actual translations take way too much time.

ドラゴンクエストIX: 星空の守り人
Dragon Quest 9: Guardian of the Star-filled Skies
OR

Saturday, July 25, 2009

SHINGENMOCHI'S DIARY: Quick Summaries and Walkthroughs of Japanese Games

DEAR DIARY: Ambushed by Japanese text you don't understand? Well worry not. The Tabiasobi Blog is here to help by providing you quick summaries for certain Japanese games. Well, unless the game is not listed below. Then you may proceed to worrying all you want. The list is less than sparse since I'm just starting this whole thing. But as they say, one small step for man... SHINGENMOCHI

Dragon Quest IX: Guardian of the Star-filled Skies
Monster Hunter 3 (Tri)

SHINGENMOCHI'S DIARY: Dragon Quest 9 Story Guide Walkthrough Vol. 1

SHINGENMOCHI'S GAME DIARY
Quick summaries of Japanese games

Scene 1: The Human World

The game starts out with your character and his/her master flying at the outskirts of the village Uoruro. According to your master, Eziel, you have just been chosen as the new guardian angel of the village. During your conversation, Eziel notices two human villagers heading straight into an ambush by some mischievous looking monsters. (I admit, this scene actually made me laugh. This has to be one of the cutest ambushes you'll ever see.)

You and Eziel both spring into action, triggering your first battle in the game. Make short work of the monsters to allow the villagers—a young woman named Rikka and an old man—to reach the village safely. Although the humans can't see you, Rikka assumes that their safe journey is the result of angels watching over them. As she expresses her gratitude, she gives off a "star aura," which comes into your possession. Eziel talks about star auras and how angels collect them from humans who believe in angels. You then head back together to the World of Angels to deliver your report—and your star aura—to the angel elder.


Scene 2: The World of Angels


Back in the World of Angels, Eziel instructs you to seek the elder, Omui, and deliver your report. Talking to the other angels reveals some bits of information about both humans and angels. Humans, apparently, are a more fragile lot than angels and can easily succumb to injury and disease. The World of Angels is also peaceful whereas the human world is prone to crime and strife. In short, it's your stereotypical view of "perfect" angels vs. "imperfect" humans.

Ironically, angels need humans in order to fulfill their ultimate destiny: reaching heaven. To do this, angels need to collect star auras from grateful humans in order to nourish the World Tree, which in turn will open the pathway for angels to heaven. This is also the reason why guardian angels are held in especially high regard in the angel world. Guardian angels are tasked with recovering star auras, and several angels will congratulate you for achieving this key position. But fulfilling a guardian angel's role isn't exactly a piece of cake either. One angel laments the fact that he has worked so hard to protect the village in his care and has yet to receive a single star aura. Unless a person believes in angels and expresses gratitude, star auras won't come out. This is further complicated by the fact that humans can't see angels, which has caused some humans to stop believing in angels over time.

Other angels talk about how strict Eziel can be, and that it's an honor to be picked by such a renowned angel as his apprentice. One angel even says he wishes that angels could pick their masters so he could ditch his slacker of a master for someone like Eziel. On a related note, you also learn that angels are not allowed to disobey their superiors. Looks like someone with the DQ9 team has read the Old Testament. Oh yeah, one of the angels will marvel at your star aura and ask you if he can have it. I said "no" by picking the second choice (don't know what happens if you say yes though I assume you still end up keeping it since it's basically a key item). Also, if you're looking for the save point, you can get to it by entering one of the doors by the stairs just north of the shimmering portal that connects to the human world.

Before heading up to talk to the elder, enter the room to the left right before his location. You'll overhear a conversation between your master Eziel and his close friend Rafette, who expresses surprise about your quick promotion. Eziel admits that he himself thinks it's too early to make you a guardian as well but that the elder Omui ordered the promotion. Upon seeing you, a surprised and chagrined Eziel asks you what you're doing dallying around. He then sternly admonishes you to report to Omui already. Once you reach Omui's location, he congratulates you for a job well done and asks you to offer up the star aura to the World Tree at the very top of the angel village.
Keep an eye out for several treasure chests on your way up to the tree. One of the angels talks about seeing a mysterious shooting star appear across the sky once in a while (you'll learn more about this later). Another mentions that the World Tree appears to be overflowing with energy lately, a sign that it should bear fruit soon.

You can get another conversation about how angels can go to the promised land once the tree bears the Fruit of the Goddess. You can also check the tree's roots by entering one of the doors below it. Right before you reach the tree, you'll see a guard. You learn that not every angel is allowed near the World Tree but guardians such as yourself have permission. Once you get to the top, release the star aura and the World Tree will react. Eziel will arrive and make a comment about how beautiful the tree is. He'll then talk about the duty that angels have and how he has high expectations of you. He'll also make a funny comment about how long your title is and asks if it's OK for him to address you differently once in a while. All this time, he's been calling you "Guardian of Uoruro Village, (your name)" every time he addresses you and he says it's a bit of a pain. I think he actually has a point ^__^. After the scene, return back to the elder, who'll be ecstatic to hear your report. SHINGENMOCHI


* Unlike this blog's TURNING JAPANESE feature, the TABITABI DIARY does not provide line-by-line translations but just quick summaries instead. 'Cause life's just too short sometimes and actual translations take way too much time.

ドラゴンクエストIX: 星空の守り人
Dragon Quest 9: Guardian of the Star-filled Skies
OR

Friday, July 24, 2009

LIVING IN AMERICA: Reviews of U.S. video game releases

HIT ME: Welcome to the Tabiasobi Blog's "Living in America" section, this site's depository for reviews of games released in Apollo Creed's favorite country. In case his get up in that photo up there doesn't make it painfully obvious enough, that would be the country of Liberia. Just kidding. As any Rocky fan would know, the Creedster just love's the good, old U-S-of-A. So in honor of one-half of the most lasting bromances in American movie history, below is the list of domestic releases I've reviewed organized in All-American alphabetical fashion. Just make sure you don't tell old Apollo that not all of them are actually made in the U.S.A. lest you want him yelling "What's wrong with you!" at the beach. SHINGENMOCHI

Eternal Sonata (PS3)
Little King's Story (Wii)
Pokemon Battle Revolution (Wii)
Pokemon Diamond/Pearl (Wii)
Resident Evil 5 (Xbox 360)
Super Paper Mario (Wii)
We Ski & Snowboard (Wii)

Review: Little King's Story for the Wii

LIVING IN AMERICA
Reviews of games released in the U.S.


blog post photo

Little King lets you entertain your delusions of grandeur in quirky fashion

LITTLE KING’S STORY
System: Nintendo Wii
Genre: Real-time strategy (well, sort of)
From: XSEED
Price: $49.99

I’m a big fan of unique and quirky video games. Not only do they add a fresh twist to the gaming landscape, they also showcase creativity in what often can be a me-too, copycat industry. Which brings us to the latest quirky game to catch my fancy: Little King’s Story for the Nintendo Wii. A cross between Pikmin and the Pied Piper of Hamlin, Little King chronicles the adventures of a young boy who stumbles upon a magic crown that gives him the power to command people. Oh, the things I’d do with a power like that. Like ordering Bill O’Reilly and Keith Olbermann into the same locked room with one of those one-way observation mirrors. That should be fun.


blog post photo

Anywho, using the loyalty of your initially unemployed subjects — combined with the strategy of your Don Quixote-like, power-hungry advisor Howser — your goal in Little King is to expand your run-down, rat-infested shack of a kingdom by conquering neighboring territories. You do this by turning your slacking subjects into hard-working citizens such as farmers, soldiers, carpenters and lumberjacks. Once you turn your peeps into more productive members of society, you can take them out to the field and have them follow every order your little kingly heart desires. This can range from digging treasure and harvesting produce for funding your conquests to ganging up on monsters and enemy targets that impede your kingdom’s expansion. This is the heart of Little King as having a good mix of subjects and skills is the key to not just defeating big bosses but finding hidden stuff and unlocking areas so you can progress further.


blog post photo

Commands are done using a real-time system; you move a cursor toward your intended target, then let loose your loyal subjects like lemming-piranhas. Seeing your cute little henchmen clumsily amble toward their target or hastily retreat to your side never gets old for yours truly — and yes, I’m that easily amused. After all, I’m the same guy who thinks that naming my king “Burger” is a stroke of comedy genius. (Hearing my character called King Burger never gets old, either. Ah, the pleasures of being easily pleased.) Let’s just say that if the sight of little guys climbing and clinging desperately to big bosses while smacking the big lugs around is something that amuses you, then you’ll be thoroughly amused by this game.


blog post photo

As you progress through the game, not only do you enlarge your territory, you also expand the type of subjects you can have. You can unlock a host of new job types — including a class that allows you to, um, recycle chickens in the field (PETA would be so not pleased). You can also upgrade older classes into more powerful or efficient versions of themselves. In addition to natural growth through expansion, you can increase your population by targeting subjects who have fallen in love and using your trusty targeting cursor to send them to church. This allows them to get married and bear a child to add to your list of obedient subjects. It’s certainly the little touches like this, including the mannerisms of your tiny king and his followers, that help make Little King’s story shine. Little King is also chockful of hilarious moments, including funny comments from the game's characters. You’ll be called a slacker, a midget and the ruler of a poor excuse for a kingdom — and those are just from your own subjects. (You may be able to command them, but that doesn’t necessarily mean you can force them to like you, especially in the beginning of the game.) With subjects like these...


The game is without its drawbacks. One of the gripes I have about this game is the missed opportunity to use the Wiimote for more accurate targeting. Oftentimes, Wii games end up tacking imprecise waggle controls to a game as their way of adding Wiimote support. This not only makes the game less fun to play, it’s also one of the quickest ways for flailing gamers to pull a freaking muscle. Little King, thankfully, doesn’t resort to waggle but its decision to use traditional controls for aiming makes it a pain to move your cursor sometimes. An option to aim with the Wiimote pointer would’ve been much better. Filing your troops up stairs can also be a pain at times because some have a tendency to fall off and get stuck at the lower levels. It’s like herding cats. Gathering and selecting troops can be an annoying exercise as well, as is having to backtrack repeatedly — especially as your territory gets bigger. Admittedly, a lot of these issues get resolved as you progress through the game and gain access to certain contraptions and abilities.


blog post photo

Overall, whatever gripes I have are minor and don’t significantly detract from what is an excellent and well-polished game. Little King is one of those rare releases that has a lot of heart, something that’s also enhanced by a classic art style that harkens back anyone’s childhood. Don’t let the classic kiddie art style and easygoing pace fool you, though. The ending for this Teen-rated game might be a bit too heavy for the kiddies. The existential climax actually gave me flashbacks of my psychology classes in college and broke my heart, to be honest. But it’s to Little King’s credit that it actually made me care that much to have my heart broken in the first place. It truly is a bittersweet pleasure. I command you to play it. SHINGENMOCHI

FINAL VERDICT: Highly recommended.

Recommended if you like: Pikmin

*** This review originally appeared in the Reno Gazette-Journal, where it was selected as a Quick Pick in the Friday Calendar's A-List section. (I'm posting it on my personal site as backup.)